
Exterior window trim is easy to overlook until rain darkens the siding or paint begins to peel beneath a sill. It frames the opening, but it also helps shed water and protect vulnerable joints. When properly selected and installed, trim can support a more durable wall assembly and give a façade a clean, finished look. Small detail. Real consequences.
As a clearly illustrative voice, fictional exterior-envelope specialist Mara Ellison puts the principle this way: “Good trim guides water away before it can trouble the wall.” This is an original, illustrative quotation—not a verified statement from a real expert. The guidance behind it is practical: inspect the sill, joints, and finish, and check that water can drain outward. Materials matter, too. Wood may need regular paint or sealant maintenance, while manufactured options still depend on careful installation.
This outline explores why exterior window trim matters for moisture control, energy performance, durability, and curb appeal. It also considers common mistakes, such as leaving gaps around the frame or treating caulk as a substitute for sound flashing. Details vary by window, wall, climate, and product. A neat bead of sealant cannot fix every weak connection. That part is easy to miss. And even well-installed trim deserves periodic inspection; sunlight, wind-driven rain, and seasonal movement can wear it down. The goal is not perfection on day one, but a detail that performs—and gets checked.
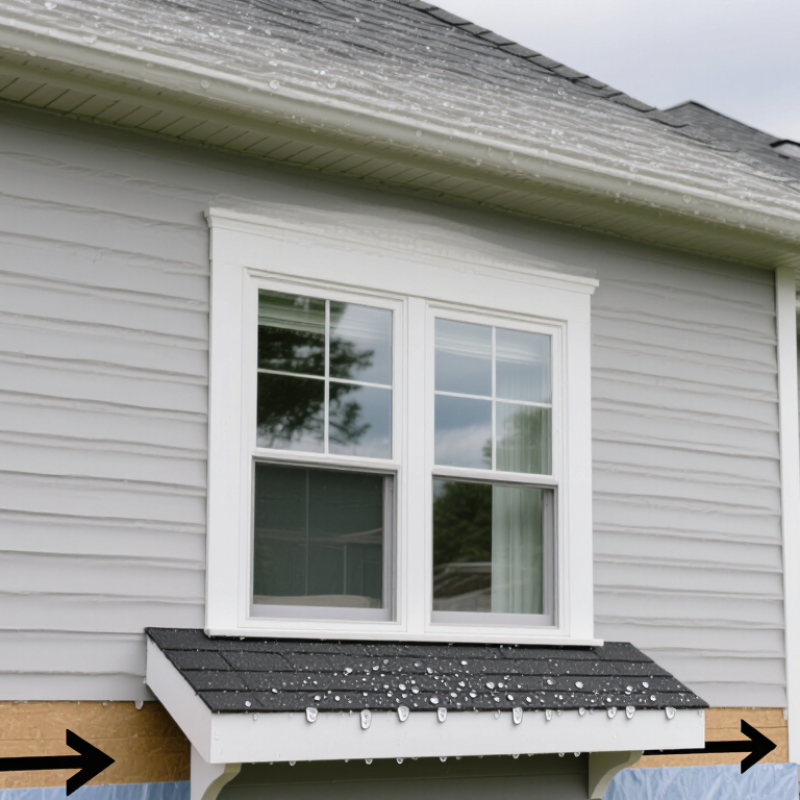
Why Is Exterior Window Trim Important?
Exterior window trim is the visible finish around a window opening. It covers the joint between the window frame and the wall, creating a cleaner edge and helping shield vulnerable seams from rain. Trim is not the window frame itself, and it cannot replace proper flashing or drainage. That distinction matters.
A typical assembly may include side casings, a top casing, and a projecting sill. A drip cap above the top casing can direct water away from the opening. The exact parts vary with the window style and wall construction. A small gap can look harmless, but it deserves a second look. Water can travel behind trim and damage paint, sheathing, or framing before stains appear indoors.
Common materials include wood, cellular PVC, fiber cement, aluminum, and engineered composites. Wood is easy to cut and repair, but needs regular paint or stain and careful sealing at exposed ends. Cellular PVC resists rot, though it can expand in heat and needs installation suited to its movement. Fiber cement holds paint well but is heavier and can be brittle during cutting. Aluminum is often used as a protective cover over wood trim; it should not trap moisture. Details matter. A neat bead of sealant helps, but relying on caulk alone is a weak plan. The trim, flashing, and wall assembly must work together.
Exterior trim helps protect the window-to-wall joint, shed water, and provide a finished edge. Materials expand at different rates as temperatures change, so suitable clearances, joints, and installation details help reduce gaps, buckling, and water entry. Values shown are representative approximate linear thermal expansion coefficients; actual values vary by product, wood grain direction, and conditions.
Why Is Exterior Window Trim Important?
Water Management: How Trim Works with IRC R703.4 Flashing
Exterior window trim helps shield the joint between the window and wall, but it is not a waterproofing system by itself. IRC R703.4 requires flashing at exterior window and door openings to direct water away from the wall and prevent it reaching framing. The layers must work together: the wall’s water-resistive barrier, sill pan, jamb flashing, and head flashing should overlap in drainage order. Think of rain running down the wall, meeting the head flashing, then moving outward over the trim—not behind it.
Small details matter. A sloped sill and end dams can guide water toward the exterior; gaps at corners can funnel it into the wall cavity. Sealant helps, but it can crack or separate, so it should not replace properly lapped flashing. Still, a tidy caulk line can look reassuring. That is worth questioning.
The Insurance Information Institute’s 2019–2023 homeowners-claims data attributes 22.6% of claims to water damage and freezing. That figure covers many causes, not windows alone, but it shows why hidden moisture deserves attention. During installation, check that the head flashing projects beyond the trim and that the lower edge remains open for drainage. Follow the applicable code edition and the window manufacturer’s installation instructions; local details and wall assemblies can change the correct approach.
| Area | Role in Water Management | Good Practice | What to Check |
|---|---|---|---|
| Exterior trim | Covers and finishes the window-to-wall area and can help shed rain, but it is not a substitute for flashing or a drainage plane. | Install trim without blocking designed drainage paths or covering required flashing edges. | Look for open joints, trapped water, soft or decayed material, and paint failure. |
| Head flashing | Directs water above the window outward and away from the opening. | Where required by the window design and applicable code, integrate the head flashing with the wall’s water-resistive barrier so upper layers drain over lower layers. | Check that the flashing is continuous, properly overlapped, and not concealed in a way that prevents drainage. |
| Jamb flashing | Helps manage water at the sides of the window opening and connect the opening to the wall’s water-control layers. | Use compatible flashing materials and follow the window manufacturer’s installation instructions and the approved wall assembly details. | Check for gaps, tears, poor adhesion, or seams that could direct water behind the flashing. |
| Sill and sill pan | Provides a drainage route for water that reaches the bottom of the opening, reducing the chance of water entering the wall assembly. | Where specified, form the sill pan with end dams or equivalent details and a path that drains to the exterior. | Confirm the sill area is not blocked by sealant, trim, or debris where drainage is intended. |
| Flashing sequence | Shingle-fashion laps help water flow over, rather than behind, lower materials. | Coordinate the window, flashing, and water-resistive barrier installation in the sequence specified for the assembly. | Inspect overlaps before trim or cladding conceals them. |
| Sealant and joints | Can limit water entry at specified joints, but should not be relied on as the only water-control measure. | Use sealant only where the window instructions and wall details call for it; preserve designed drainage and ventilation paths. | Check for cracked, detached, or missing sealant and renew it as appropriate for the materials and exposure. |
| IRC R703.4 context | The International Residential Code addresses flashing at specified locations, including exterior wall openings, to help prevent water from entering the wall assembly. | Use the locally adopted code edition, approved construction documents, and manufacturer instructions to determine the required materials and installation details. | Requirements and accepted details can vary by code edition, jurisdiction, product, and wall assembly. |
General information only. Confirm project-specific flashing and trim details with the locally adopted code and the window manufacturer’s instructions.
Windows are not minor openings. The U.S. Department of Energy’s Energy Saver guidance estimates that heat gain and loss through windows account for 25–30% of residential heating and cooling energy use. That figure covers the window system, not exterior trim alone. Still, trim helps protect the joints around the frame, where wind-driven rain and air leaks can undermine comfort.
Look closely at the outside edge: cracked caulk, loose boards, or a dark gap can signal trouble. Trim should shed water, while proper flashing and sealed joints help direct moisture away from the wall. Small gaps matter. But trim is not a cure-all; a persistent draft may come from the sash, installation, or insulation behind the frame. I would not blame the trim without checking those areas.
The U.S. EPA’s ENERGY STAR guidance says replacing single-pane windows with certified models can reduce energy bills by an average of 12%. That estimate concerns window replacement, not trim repairs, so it should not be treated as a promise of savings from new caulk. Well-maintained trim supports the window assembly’s protection. It is a modest detail, easy to overlook—and worth inspecting before winter.
Exterior window trim is more than a visual frame; it helps protect the joint between the window and the wall. ASTM E2112, the standard practice for installing exterior windows, doors, and skylights, emphasizes coordinated installation details and water management. Work should begin with a clean, properly prepared opening and a sill detail that drains outward. Flashing layers should overlap in shingle fashion, directing water away from the wall. Small overlaps matter. Sealant closes specified gaps, but it should not block drainage paths built into the assembly.
The U.S. Department of Energy’s Energy Saver guidance says air leakage may account for 25–40% of heating and cooling energy use in typical homes. That figure is not specific to windows, but it shows why perimeter sealing deserves care. After trim is fitted, inspect corners, fasteners, and sealant lines for gaps or pinholes. Check after rain, too. ASTM E2112 provides installation guidance, while the wall assembly and product instructions determine the appropriate details. A neat bead cannot correct reversed flashing. That is easy to overlook.
Exterior window trim is more than a decorative border. It helps direct rain away from joints where water can reach the wall or window frame. The U.S. Department of Energy’s Energy Saver guidance estimates that windows account for 25%–30% of residential heating and cooling energy use. That figure is not a trim-specific estimate, but it shows why the whole window assembly deserves regular attention.
Inspect the trim after heavy rain and during seasonal maintenance. Check corners and joints for cracked sealant, open seams, or soft, swollen wood. Look for peeling paint, blistering, and dark stains beneath the sill. These can signal trapped moisture, though stains alone do not confirm rot. Keep drainage paths clear; blocked openings can leave water sitting where it should escape. A careful visual check helps, but hidden damage may need a qualified building professional to assess.
Tips: Run a finger gently along accessible joints to feel for gaps, and photograph any changes over time. Avoid sealing drainage openings. I might be tempted to patch every crack at once, but the cause matters: persistent water often needs attention before fresh sealant or paint.